
Batomon Showdown Beginner Guide: How Your First Run Works
A run ends at 10 wins, and from day 5 every loss costs 3 of your 10 lives. Here are the 1.0 shop, merging and event rules plus a day-by-day first-run plan.

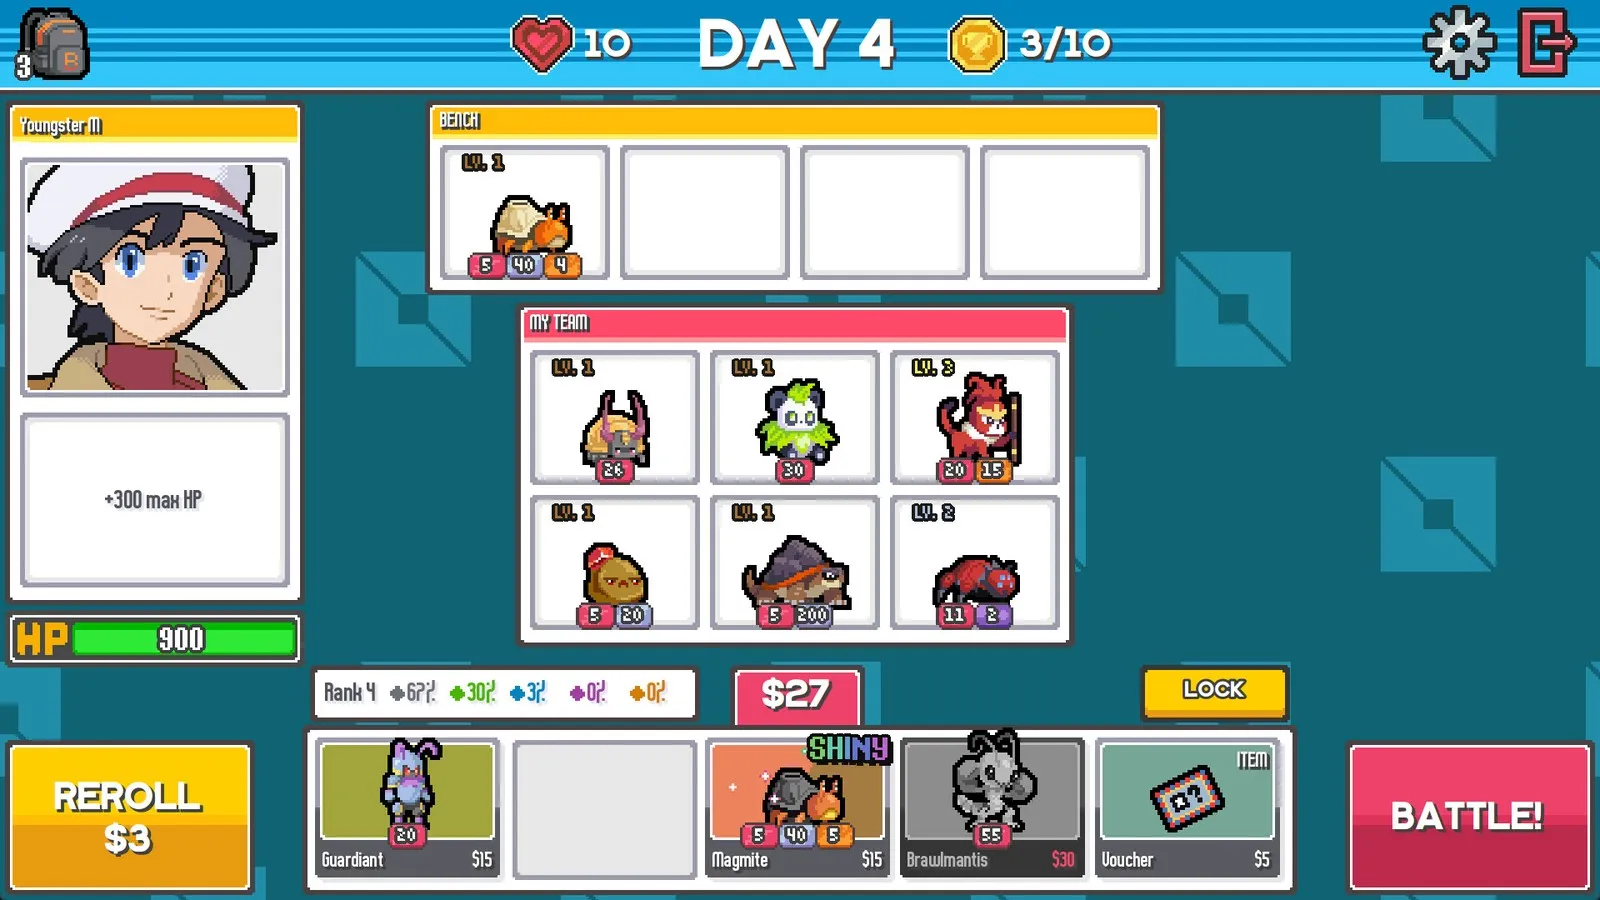
A run of Batomon Showdown ends when you reach 10 wins or run out of lives. You start with 10 lives. Days 1 and 2 cost you 1 life per loss, days 3 and 4 cost 2, and from day 5 it becomes 3 lives every time. The first time your lives hit zero, Second Chance puts you back on 1 life and hands you a reward event. The next time they hit zero, the run is over.
Most new players lose runs because they treat day 5 like any other day. Up to day 4 you can afford to lose. From day 5, every loss costs 3 lives, which means 10 lives only buy you three defeats. So stop asking “can I win this one” and start asking “will losing this end my run”.
How a run is structured
A run alternates between an untimed shop phase and automatic battles.
- You field up to six Batomon, and the whole team shares one HP pool. Losing a single Batomon does not lose you the fight; the shared bar has to hit zero.
- The shop has no timer. You can keep counting, keep repositioning, until you press Battle.
- Pressing Battle locks the shop and starts a search for an opponent board from the same day. The fight then resolves on its own.
- Thirty seconds in, sudden death begins: both sides take escalating damage every half second until someone dies.
Who you are actually fighting
You fight saved boards, not a live human sitting across from you.
Matchmaking looks for another player’s saved board from the same numbered day on the same balance build. If it cannot find one, it widens the search: an older compatible build, a prebuilt bot board, and eventually even your own board can come back at you. So when an opponent looks absurdly strong, that usually means the pool got widened, not that you did something wrong.
Two upsides follow from this. You can take as long as you like, and comparisons inside the same day are more or less fair.
Shop, gold and merging
Each day opens with five shop slots. That is normally four Batomon plus one item; once the day’s item uses are gone, the fifth slot offers another Batomon.
A normal reroll costs 3 gold. If you have a free reroll banked, the game spends that one first. You can press LOCK to carry the current shop into tomorrow. Shop rank rises with the day, and it changes the odds of each rarity showing up, not which specific creature you get.
Merging is fixed: three copies of the same level 1 creature make one level 2, and two level 2 copies make one level 3. Every merge also hands you a trinket choice. Standard merging stops at level 3, so level 4 needs another route entirely, covered on levels, merging, level 4 and Shiny.
One rule is easy to forget: once you own a level 3 of a species, that species stops appearing in the shop, pre-evolutions included. So “hoard three level 3s and build a level 4” is not a thing.
How combat resolves
There is no fixed turn order. Several trigger timings run at the same time.
| Trigger | When it fires |
|---|---|
| On Battle Start | Resolves once before the fight begins |
| On Cast | Fires when that Batomon’s own cooldown completes |
| Ongoing | Applies continuously and re-resolves |
| On Knockout | Fires when a unit is knocked out |
| On Victory | Fires when the win condition is met |
When several effects land on the same tick, the order is fixed: shield, then damage, then statuses, then healing.
Because the timings differ, two creatures that both look strong on paper can ignore each other completely. Build a board around one shared timing and the effects stack instead. Board position matters for the same reason: plenty of abilities target “the slot behind”, “adjacent” or “the same column”.
What to do on days 1 to 5
- Pick your trainer first. Take one that pays off immediately: a free starting creature, daily free rerolls, or a higher opening shop rank. The trade-offs are on the trainer page.
- On days 1 and 2, buy cheap bodies that fight. Do not save up for rares. Spending big in the first two days usually just buys you a losing streak.
- On day 3, take the event option that pays off right now. Events normally land before days 3, 6 and 9, and Second Chance adds one of its own.
- On days 4 and 5, commit to a line. By now you should know whether you are on shields, status damage, shock or a cooldown engine, and you should only buy for that line.
- From day 5, price every loss at 3 lives. If your line clearly loses to same-day opponents, buy a cheap stopgap instead of waiting for the one card that fixes everything.
Four things to check when you keep losing
You are bleeding out. Check whether you have shields up front, or enough healing. All-in damage boards get deleted by a single burst in the mid game.
You cannot kill anything. Is your damage locked into one damage type that their shields and resistances soak up? Shield also reduces status damage, so a pure status board slows down badly against it.
Your carry never shows up. Check your shop rank, then check whether you already own a level 3 of that species, because that removes it from the pool. Rerolls cost gold, so do not stand there rerolling one slot forever.
Merging stalls. Confirm whether the target species evolves. Some units become a different species at level 3, and your merge plan has to follow.
Where to go next
- Team comps and the current meta: what is winning right now, and how to build from day 1 to day 10.
- Extended Mode, the endless mode: how to carry a finished team past day 10 and up to day 40.
- Ranked and seasons: unlock requirements, how stars and MMR work, and what a season reset does.
Related pages
guide
Batomon Showdown Level 4, Merging and Shiny Explained
Merging is three level 1 copies into level 2 and two level 2 copies into level 3, and it stops there. Level 4 needs events or upgrade items. Plus the Shiny rules.
guide
Batomon Showdown Mythical Batomon: What They Are and How to Get One
Mythical sits above Legendary and never appears in the normal shop. Here is the developer wording behind that, how players reach one, and the matching rules.
guide
Batomon Showdown Trainers: Every Ability and Which to Pick
You pick a trainer before the run and keep it throughout, and trainers change rules rather than stats. All 17 launch trainers, plus the six added in 1.0.